Sometimes, starting a new paper for a class assignment can seem a bit daunting – not only do you have to pick a topic, do some research, and draft the content, there’s all the formatting guidelines you need to follow. In this tutorial, I’ll outline the basic steps for starting an academic paper according to the 7th edition of the American Psychological Association’s (APA) Publication Manual.
You can check out the video tutorial here.
And I’ve created a quick reference for you.
Before proceeding, always double check if your instructor or institution has specific guidelines that supersede the APA manual. If so, please modify my instructions accordingly.
To get started, you’ll want to open Microsoft Word and create a blank document.
Now that you have your Word document open, let’s begin with the foundational details.

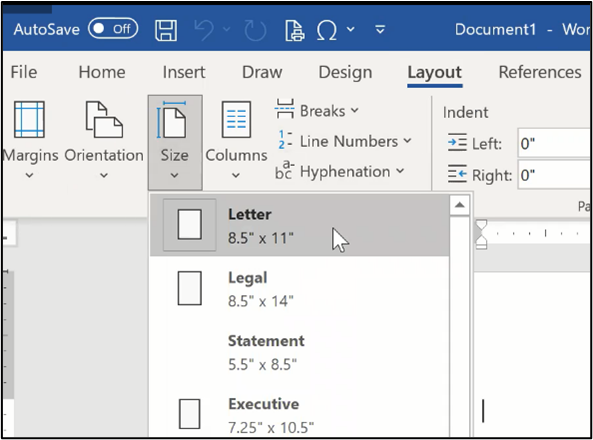
According to the APA 7 guidelines, your paper should be on standard letter-sized (8.5” x 11”) paper with a 1” margin on all sides. To check the size and margins of your paper, go to the Layout tab. Click the Size option and confirm that Letter (8.5” x 11”) is selected. Then, click on the Margins option and select the Normal setting that has 1” margins on all sides of the page.

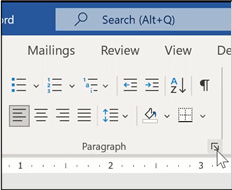
Next, APA 7 requires your text to be double-spaced throughout the document and your font needs to be accessible – in other words, easy to read. For the line spacing, return to the Home tab and click on the pop-out button for Paragraph settings. In the Paragraph menu box, you want to select Double for your line spacing and make sure the Before and After spacings are set to zero. Then click OK.

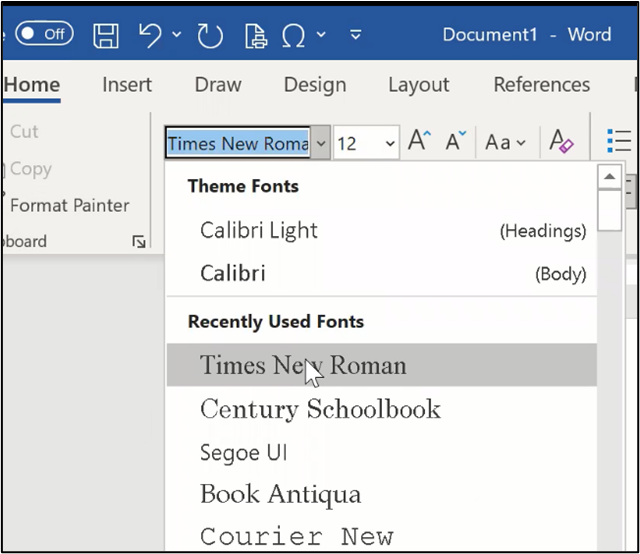
For student papers, APA 7 suggests several accessible fonts in Section 2.19 of the manual. The font I most commonly see used is 12-point Times New Roman. On the Home tab, use the drop-down menus to select Times New Roman and size 12.

APA 7 also requires the page number to appear on the top right corner of each page. To add the page number, start by going to the Insert tab. Click on the Page Number drop-down menu, go to Top of Page, and select Plain Number 3, which places the page number in the top right corner.

Then click Close Header & Footer.

Now, let’s start creating your title page.
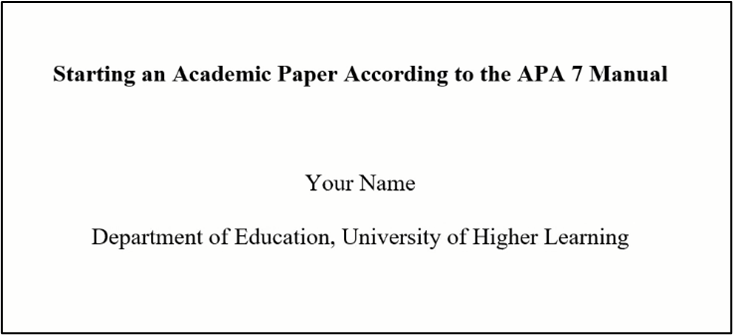
The first line of text that will appear on your title page is, of course, the title of your paper.
The title is located 4 double-spaced lines down from the top of the page. So, hit enter 4 times.
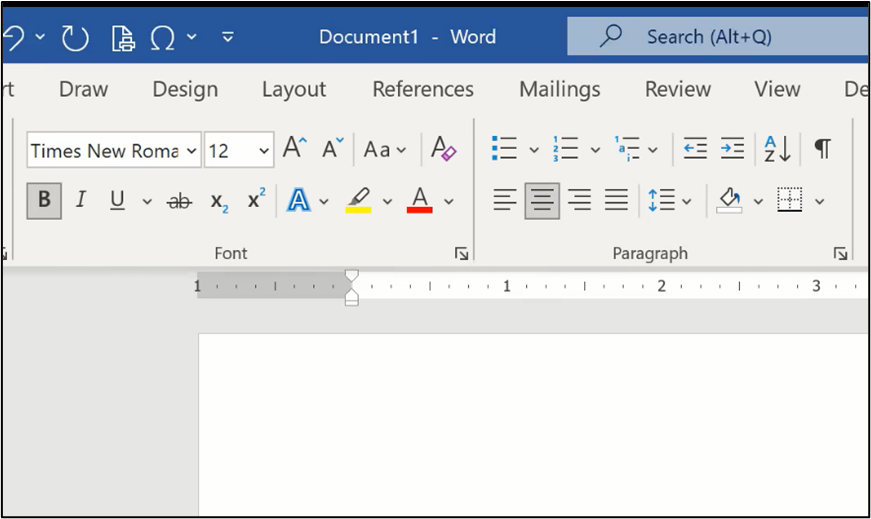
The title needs to be bold and centred. So, on the Home tab, click on the B for bold and on the centre align icon.
Aside from any instructor requirements, you want to select a title that concisely reflects the nature or main idea of your paper. As you type the title, remember to use title case, which means all major words are capitalized.
Once you have finished typing your title, you can turn off the bold setting by clicking the B again. The rest of the text on your title page will be in plain font but will remain centred.

Now, hit enter twice to leave one blank double-spaced line between the title and the author’s name. For the most part, the author name is your name. However, if you are submitting a group project paper, the names of all members need to be included. See Section 2.5 of the APA 7 manual for more details.
Type your name in standard font – that means no bold and no italics. And be consistent in how you present your name on your papers. For example, if you use your middle initial, always use it. This avoids confusion for your instructors (especially if your name is similar to that of another student) and it will be easier for readers to find your work if/when you start to publish.

The next piece of information is the name of the department and institution you’re affiliated with. Hit enter to move to the line below and separate the department and institution names with a comma.

On the next line (hit enter) write the course number and the name of the course, using a colon to separate the two.
Moving to the following line, insert the name of your instructor.

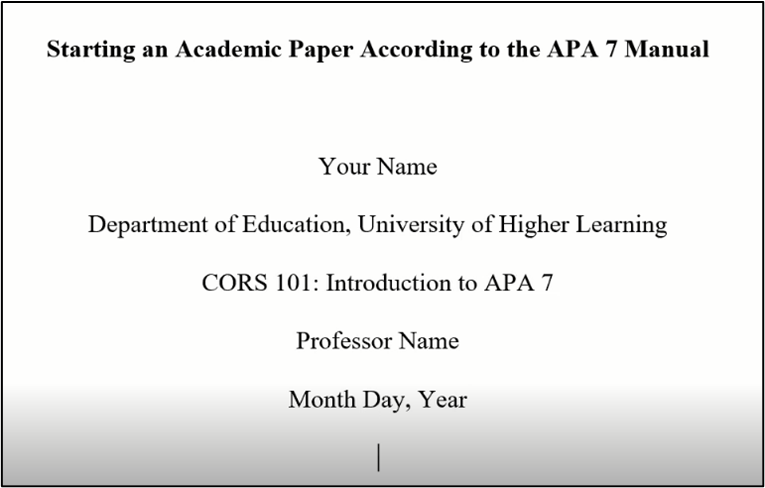
The final detail for your title page is the due date of your paper. Hit enter and write the full date using the month, day, year format.
Then hit enter one more time.
Congratulations, you’ve just completed your title page!
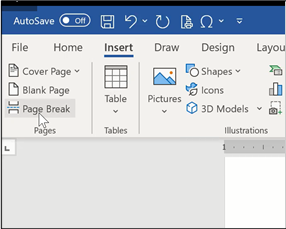
Now, it’s time to start the body of the paper, which will begin at the top of the next page. To get there, go to the Insert tab and click on Page Break. This takes you to the top of the next page.
If you are asked to include an abstract, please see Section 2.9 in the APA 7 manual. Once the abstract is complete, you will follow these same steps to insert another page break before starting the body of the paper.
At the top of the page, type the title of your paper, exactly as it appeared on the title page – same words, centred, bold, and in title case. Like we did before, click the B to bold your text and select the align centre option, if it’s not already selected.

Once you’ve typed your title, turn off the bold, hit enter, and select the align left option.
Press the tab button on your keyboard to indent the first line of text for your introduction and be sure the first line of each new paragraph is indented.

As you write your paper, you may find the need to use headings and sub-headings to organize your content. Please refer to Section 2.27 in the APA 7 manual for the five levels of headings. It should be noted that the introduction of your paper does not get a heading, as it is understood that the first section of the paper is always the introduction.
For most academic papers you will draw upon materials and resources that you will need to cite and reference. Please see Chapters 8 and 9 in the APA 7 manual for guidance on in-text citations and the reference list, respectively, with examples provided in Chapter 10. Don’t forget to check out the sections in Chapter 8 that cover paraphrasing and quoting to ensure you include and cite your researched material correctly.
I strongly recommend that you enter your in-text citations and reference list entries as you include the relevant information in your paper. Planning to go back to these important details after the paper is written runs the high risk of running out of time, forgetting what goes where, making an error, and/or omitting a citation/reference. Take the time to prevent an unintentional act of plagiarism.
Let’s make it easier to keep up with your references by setting up your References page right now.
We’ll start by inserting a new page, like we did before. Once positioned on a new line, go to the Insert tab and select Page Break.

Once at the top of the new page, return to the Home tab, select the bold and centre options. Type References. Then turn off the bold, hit enter, and select the align left option.


The References page remains double-spaced; however, it needs to be formatted with a hanging indent.
On the Home tab, go to the Paragraph pop-out menu and select Hanging in the Special Indentation section. Then click OK.
As you type from this point forward, your references will be formatted with a hanging indent.
Don’t forget to arrange your references in alphabetical order as detailed in Section 9.44 of the APA 7 manual.

Now you have the basic formatting framework prepared for you to write your paper. Congrats!
Don’t forget to save your hard work. I suggest saving this as a sample or template that you can use each time you start a new paper. It can save you a bit of time if you don’t have to worry about the formatting technicalities before you start writing. Just be sure you remember to change the paper-specific details – such as the title, course name, instructor, and due date – for each new paper.
I hope you found this tutorial helpful.
Good luck with your paper.

